
Pests and Diseases
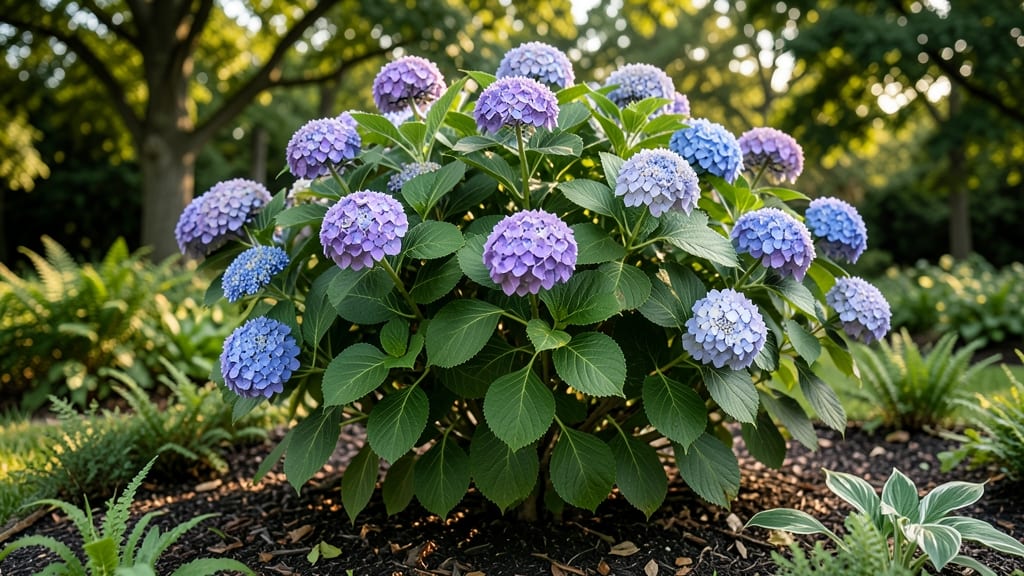
Big leaf hydrangeas transform any garden into a dreamy, vibrant display with their dramatic blooms—if you know their secrets. 🌸 I’ve spent years perfecting my approach, and the difference between a hydrangea that thrives and one that struggles often comes down to pruning timing and pest prevention.
These plants reward patience with football-sized blooms that last from summer through fall, but they demand a little extra care to stay healthy.
Start with the right conditions: partial shade (morning sun, afternoon shade) and moist, well-draining soil rich in organic matter. Big leaf hydrangeas hate soggy roots, so amend clay soil with compost and mulch heavily to retain moisture.
Once established, they’re surprisingly low-maintenance—just watch for powdery mildew and aphids, which can deflate blooms if left unchecked. A simple spray of neem oil keeps pests at bay without harsh chemicals.
The pruning schedule is where most gardeners trip up. Prune right after flowering (late summer) to shape the plant and encourage next year’s blooms—never in early spring, which removes next season’s flower buds.
For established plants, cut back 1/3 of the oldest stems to the nearest node, and remove any dead or crossing branches. The result? A bushier, more productive plant with bolder blooms every year.
Winter care is simple: mulch heavily (3–4 inches) to insulate roots, and avoid pruning until spring if you’re in a cold zone. Big leaf hydrangeas are hardy to USDA Zone 5, but younger plants may need winter protection in colder areas.
With the right pruning, pest control, and a little seasonal TLC, your hydrangeas will become the showstopper of your garden—year after year.
📚 In This Guide
- What you need
- Instructions
- Tips and common mistakes
- Wrapping up and next steps
What you need
- ● Pruning shears: Sharp, bypass-style shears (4-6" blades) for clean cuts—sterilize with rubbing alcohol between cuts to prevent disease spread.
- ● Hand pruners: Small, ergonomic pruners (3-4" blades) for delicate trimming of smaller stems.
- ● Loppers: Long-handled (24-36") for thicker branches (1-2" diameter).
- ● Gloves: Heavy-duty, chemical-resistant gloves (e.g., nitrile-coated) for protection during pruning and pest control.
- ● Disinfectant: 70% isopropyl alcohol or a 10% bleach solution (1 part bleach to 9 parts water) for sterilizing tools.
- ● Pest control: Neem oil (1-2% concentration) – 1 tbsp per gallon of water (spray in evening to avoid burning leaves).
- ● Insecticidal soap (e.g., Safer® Brand) – 1-2 tbsp per gallon of water (reapply every 7-10 days).
- ● Horticultural oil (e.g., JMS Stylet Oil) – 1-2% concentration for smothering pests like scale.
- ● Fungicide: Copper fungicide (e.g., Bordeaux mixture) or myclobutanil-based (e.g., Immunox) for powdery mildew prevention.
- ● Mulch: Organic mulch (2-3" layer of shredded bark or pine straw) to retain moisture and deter weeds.
- ● Watering can or hose: Adjustable nozzle for gentle watering (avoid wetting foliage if fungal diseases are present).
- ● Pruning saw: For thick, woody stems (>2" diameter) that loppers can’t handle.
- ● Plant tie or twine: To support weak stems after pruning (avoid plastic ties, which can girdle growth).
- ● Soil pH test kit: To monitor acidity (4.5-5.5 pH) for optimal blue/pink flower color adjustments.
- ● Reflective mulch: Aluminum foil or landscape fabric to deter slugs and snails in damp climates.
- ● Beneficial nematodes: (Phasmarhabditis hermaphrodita) for slug/snail control (apply in early evening).
How to prune and protect your big leaf hydrangea year-round
Here’s the method I’ve perfected over years of growing these stunning shrubs—keeping them lush, blooming, and pest-free.
✂️ Step 1: Understand the Pruning Timeline for Big Leaf Hydrangeas
Big leaf hydrangeas bloom on old wood, meaning last year’s growth produces this year’s flowers. Prune at the wrong time, and you’ll sacrifice blooms. The key is to prune immediately after flowering, typically in late summer or early fall (August-September). This gives the plant time to develop next year’s flower buds before winter dormancy.
If you miss the window, don’t panic. Light pruning in late winter or early spring (before buds swell) is better than nothing, but expect fewer blooms that season. I always mark my calendar—skipping this step means fewer flowers next year.
🌿 Step 2: Prune for Shape and Airflow
Start by removing dead, diseased, or crossing branches first. These compete for energy and block airflow, inviting pests and fungal issues. Cut back to the nearest outward-facing bud or branch collar. Use clean, sharp pruners to avoid tearing bark, which invites infections.
Next, thin out crowded stems to improve airflow. Aim for an open, vase-like shape—this prevents humidity buildup in the center, where pests like aphids and powdery mildew love to hide. Leave strong, healthy stems that show new growth at the tips. You’ll know you’ve done it right when sunlight reaches the center of the plant.
🪴 Step 3: Apply Pest-Proofing Treatments
Big leaf hydrangeas attract pests like lace bugs, aphids, and spider mites. The best defense is a neem oil spray applied in early spring and late summer. Mix 1 tablespoon of neem oil with 1 quart of water and a drop of dish soap (as an emulsifier). Spray the undersides of leaves where pests hide. Repeat every 2 weeks until pests disappear.
For fungal issues like powdery mildew, apply a baking soda spray (1 tablespoon baking soda + 1 quart water + a drop of soap) weekly until the problem clears. Always spray in the early morning so the leaves dry quickly, preventing fungal growth. I’ve found that prevention beats treatment—consistent sprays keep my hydrangeas thriving.
☀️ Step 4: Mulch and Water for Winter Resilience
After pruning, add a 3-inch layer of mulch around the base of the plant (but keep it 6 inches away from the trunk to prevent rot). Use organic mulch like shredded bark or wood chips, which breaks down over time and improves soil structure. This protects roots from freeze-thaw cycles and retains moisture.
Water deeply once a week during the growing season, aiming for 1 inch of water per week. In drought conditions, increase to 2 inches per week to prevent flower buds from drying out. I always check soil moisture by sticking my finger 2 inches deep—if it’s dry, it’s time to water. Hydrangeas hate soggy roots but also can’t handle drought stress.
⏰ Step 5: Monitor and Adjust for Next Year
Keep an eye on your hydrangea throughout the year. If you notice yellowing leaves, it could signal overwatering or nutrient deficiency. If flowers are small or sparse, you may have pruned too late or too aggressively. Adjust your approach for next year—hydrangeas are forgiving but respond best to consistency.
Every spring, I fertilize with a balanced 10-10-10 or 20-20-20 formula in early spring (just as new growth begins). Avoid high-nitrogen fertilizers—they promote leafy growth at the expense of flowers. A little goes a long way with these shrubs.
Tips & tricks for perfect big leaf hydrangea care
These practical insights will help you avoid common pitfalls and keep your hydrangeas thriving year after year.
Pruning Precision: When pruning immediately after flowering in late summer (August-September), focus on removing only about one-third of the oldest stems—never more. These old stems carry next year's flower buds, so aggressive cuts will reduce blooms. I mark stems with masking tape before pruning to track which ones I've already cut back. This method ensures you never over-prune while still maintaining that open, airy shape.
Pest-Proofing Strategy: The 2-week interval between neem oil applications is crucial for breaking pest life cycles. I've found that adding a few drops of garlic oil to the neem mixture enhances its effectiveness against lace bugs and aphids. Always apply in the early morning when humidity is high—this helps the spray adhere better to leaves and reach hidden pests on the undersides. Remember, consistency is key: missing even one application can lead to an infestation.
Mulching Mastery: That 3-inch layer of mulch isn't just about insulation—it's also about creating a moisture barrier that prevents soil-borne diseases. I use shredded hardwood mulch because it breaks down slowly and improves soil structure over time. The critical detail is keeping mulch 6 inches away from the trunk to prevent rot. I often draw a circle in the soil with chalk to mark the safe mulching zone before applying.
Watering Wisdom: The 1-inch weekly watering guideline assumes average rainfall conditions. In my experience, hydrangeas actually prefer slightly drier soil in winter to prevent root rot. I adjust my watering schedule seasonally: 1 inch per week in summer, half that in spring/fall, and only watering when the soil is completely dry in winter. Always water at the base rather than overhead to reduce fungal risks.
Pro Tips for Big Leaf Hydrangea
- These practical insights will help you avoid common pitfalls and keep your hydrangeas thriving year after year.
- Pruning Precision: When pruning immediately after flowering in late summer (August-September), focus on removing only...
- Pest-Proofing Strategy: The 2-week interval between neem oil applications is crucial for breaking pest life cycles. I...
Frequently asked questions
Got questions about keeping your big leaf hydrangea thriving? You’re not alone! Here are answers to the most common concerns—from pruning puzzles to pest problems—so you can enjoy stunning blooms year after year.
When is the best time to prune big leaf hydrangeas?
The ideal window is late winter or early spring (before new growth starts), but you can also prune lightly after blooming if needed. Avoid heavy cuts in fall—it removes next year’s flower buds! For blue blooms, prune just after flowering to shape without sacrificing color.
Why are my big leaf hydrangea leaves turning yellow or brown?
Yellow leaves often signal overwatering or poor drainage, while brown edges can mean underwatering or sunburn (if planted in hot, exposed spots). Check soil moisture and mulch well—hydrangeas love consistently moist (not soggy) soil. Fungal issues? Look for powdery mildew on undersides.
What pests should I watch for, and how do I get rid of them?
Common culprits include aphids (sticky leaves), slugs (chewed edges), and spider mites (speckled leaves). Blast aphids off with water, use beer traps for slugs, and spray neem oil for mites. Prevention tip: Keep plants healthy and mulch to deter pests!
Can I change my big leaf hydrangea’s flower color?
Yes! Blue blooms thrive in acidic soil (pH 5.5–6.0), while pink loves neutral soil (pH 6.0–7.0). Test your soil and amend with alum (for blue) or lime (for pink). Pro tip: Color shifts take 4–6 weeks—be patient!
What’s a good alternative if my big leaf hydrangea struggles in my climate?
Try oakleaf hydrangea (hardier, heat-tolerant) or panicle hydrangea (drought-resistant). Both offer stunning blooms with less fuss! For shady spots, mountain hydrangea is a great low-maintenance swap.
Bonus Tip: Mulch matters!
Add 2–3 inches of mulch around the base (but not touching the stem) to retain moisture, regulate soil temp, and suppress weeds. Wood chips or shredded bark work best—just refresh it annually!
Wrapping up and next steps
Growing a thriving big leaf hydrangea is all about timing, patience, and a little know-how! 🌿 With the right pruning techniques—whether in late winter or early spring—and proactive pest-proofing, you’ll enjoy lush blooms and vibrant foliage for years.
Don’t let challenges like aphids or powdery mildew discourage you; a few simple steps can keep your plant healthy and happy.
Ready to take the next step? Start small—pick one pruning tip or pest-prevention strategy to try this season, and watch your hydrangea flourish. Happy gardening!