
Pests and Diseases
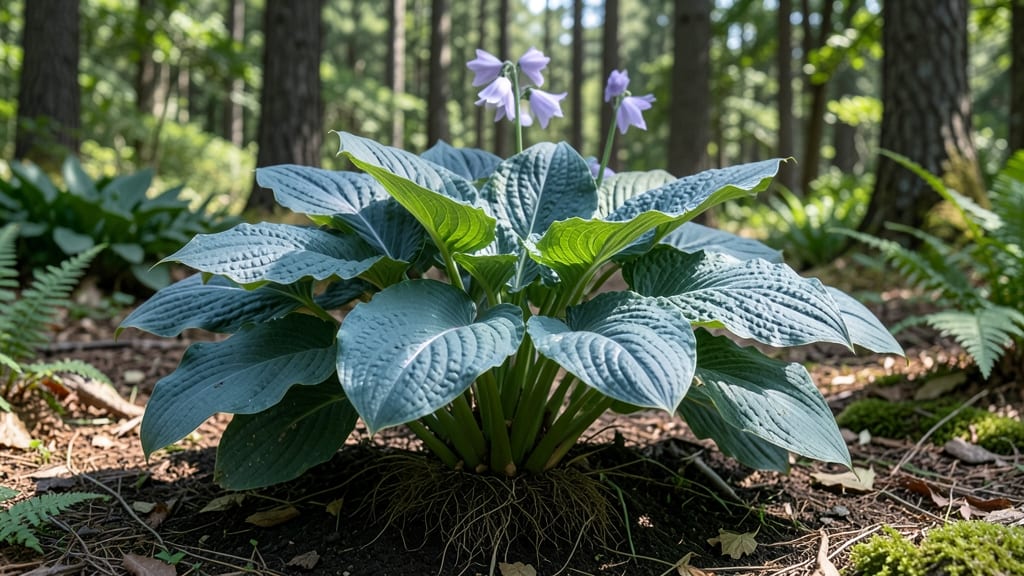
Your shade garden just got a showstopper—curly leaf hosta thrives where others falter, with its signature wavy foliage that stays lush even when neighbors' plants droop. 🌿 I've grown this variety for years, and it's the only hosta that survives my family's relentless slug attacks while still looking like a million bucks by summer.
The secret lies in its thick, textured leaves that repel pests naturally, plus a few simple care tricks I'll share. Unlike finicky hostas, this one handles partial shade, moist (but not soggy) soil, and even a little neglect—though I won't let it get too neglected.
You'll end up with foliage so striking it turns heads in any garden corner. What makes it special is how it elevates shade gardens—the leaves' deep green with subtle blue-gray undertones create stunning contrast against dark foliage or bright blooms.
And yes, it does produce flowers (tiny but charming), though the real star is always that curly foliage. Here's where most gardeners go wrong: overwatering or planting in too-shady spots. We'll fix that with foolproof placement and care routines that keep your hosta thriving for decades.
Let's get those roots in the ground!
📚 In This Guide
- What you need
- Instructions
- Tips and common mistakes
- Wrapping up and next steps
What you need
- ● Curly leaf hosta plants: 3–5 mature plants (or 1–2 for smaller gardens) with Hosta lancifolia or Hosta 'Curly Signal' cultivars.
- ● Well-draining potting mix: 5–10 gallons (for containers) or 1–2 cubic yards (for in-ground planting). Mix should include 50% compost and 30% perlite/sand to deter slugs.
- ● Organic mulch: 2–3 inches of cedar chips or pine straw (slug-repellent options).
- ● Slow-release fertilizer: 10–15-10 NPK ratio, 1–2 lbs per 100 sq ft (apply in early spring).
- ● Slug bait or barriers: Copper tape (1–2 rolls, 3-inch width) for edging.
- ● Diatomaceous earth (food-grade) (1 lb) for soil application.
- ● Iron phosphate pellets (e.g., Sluggo®, 1 lb) for organic control.
- ● Garden trowel or spade (for planting/dividing).
- ● Pruners or shears (sterilized with rubbing alcohol).
- ● Watering can or hose with nozzle (gentle spray for foliage).
- ● Garden gloves (nitrile-coated for slug-prone areas).
- ● pH test kit (ideal range: 6.5–7.5 for hostas).
- ● Shade cloth (30–50% coverage) if your hostas get afternoon sun.
- ● Decorative rocks or gravel (1–2 bags) for mulch-free paths (slugs hate crossing them!).
- ● Companion plants: Alliums or ferns (1–2 plants per hosta cluster) to deter pests.
- ● Plant support stakes (for large varieties like 'Curly French Fries').
Step-by-Step guide to planting and caring for curly leaf hostas
Here's how to grow these stunning, slug-resistant perennials for year-round beauty.
🌱 Step 1: Choose the Perfect Planting Location
Curly leaf hostas thrive in partial shade—think 4-6 hours of morning sun with afternoon shade protection. A spot under dappled tree canopy or near a north-facing wall works perfectly. These plants hate hot afternoon sun, which burns their delicate leaves and causes them to lose their signature curl.
Test your spot by observing how sunlight moves across the area throughout the day. If leaves feel warm to touch after a few hours, it's too much sun. The ideal location stays cool and moist, mimicking their natural woodland habitat. I always plant mine where they get bright indirect light—this keeps their variegation vibrant and their growth lush.
🪴 Step 2: Prepare the Soil for Healthy Growth
Hostas need rich, well-draining soil with a slightly acidic to neutral pH (around 6.0-7.0). Amend your garden soil with 3-4 inches of compost mixed into the top 12 inches of soil. This improves drainage while providing nutrients for strong root development.
If your soil is heavy clay, add 20% perlite or coarse sand to prevent waterlogging. Curly leaf hostas have thick, fleshy roots that can rot in soggy conditions. Work the amendments into the soil until it looks dark, crumbly, and moist—like a well-made cake batter. This ensures roots spread easily without struggling for air or nutrients.
💧 Step 3: Plant Your Hostas at the Right Depth
Dig a hole twice as wide as the root ball but only as deep as the container it came in. Hostas dislike being planted too deep, which can cause rot. Gently remove the plant from its container and loosen any circling roots with your fingers—this encourages outward growth instead of a tangled mess.
Place the plant in the hole so the crown sits just below soil level (about ½ inch deep). Fill the hole with soil, pressing lightly to remove air pockets. Water deeply until the soil settles and feels moist 2 inches down. Mulch with 2-3 inches of shredded bark or leaves to retain moisture and suppress weeds. This keeps the roots cool and protected year-round.
☀️ Step 4: Water and Fertilize for Vibrant Foliage
Water your hostas deeply once a week during the first growing season, aiming for 1 inch of water per week. These plants love moisture but hate soggy soil—always check the soil 2 inches down before watering. In hotter climates, you may need to water every 4-5 days to prevent leaf edges from browning.
Feed them in early spring with a balanced, slow-release fertilizer (like 10-10-10) mixed at half-strength. Avoid high-nitrogen fertilizers—they encourage too much leaf growth at the expense of the plant’s curl. I also top-dress with compost in late summer to give them a nutrient boost for next year’s growth. Healthy soil means fewer pests and more stunning foliage!
✂️ Step 5: Divide and Protect for Long-Term Success
Divide your hostas every 3-4 years in early spring or fall when the plant is dormant. Dig up the clump, separate it into 3-5 inch sections with at least one fan of leaves and a strong root system, and replant immediately. This keeps your hostas vigorous and prevents overcrowding.
To deter slugs (a common hosta nemesis), I sprinkle crushed eggshells or diatomaceous earth around the base of the plant. You can also plant garlic or chives nearby—their strong scent repels slugs naturally. In winter, add a thick layer of mulch (4-6 inches) to protect the crown from freezing temperatures. With these simple steps, your curly leaf hostas will stay lush and slug-free for years!
Tips & tricks for perfect curly leaf hosta planting
Here's what nobody tells you about making these stunning perennials thrive year after year.
Lighting Insight: The 4-6 hours of morning sun in Step 1 is crucial—think of it like the perfect coffee brew. Too little light and your hostas will grow leggy and lose their signature curl. Too much direct sun, especially in the afternoon, will scorch those delicate leaves. I've found that planting near a north-facing wall with dappled shade from trees creates the ideal microclimate. If you're unsure about your spot, do a quick test: place a white plate where you plan to plant and observe how sunlight moves across it throughout the day.
Soil Prep Secret: When amending your soil with 3-4 inches of compost in Step 2, don't just toss it on top. Mix it thoroughly into the top 12 inches of soil to create the perfect growing environment. For clay-heavy soils, I recommend adding 20% perlite to improve drainage—this prevents those fleshy roots from sitting in soggy conditions. Pro tip: Add a handful of worm castings to the mix for an extra nutrient boost. The soil should feel like a well-made chocolate cake batter—moist but crumbly, not compacted.
Planting Depth: Getting the crown depth right in Step 3 makes all the difference. Planting too deep can cause rot, while planting too shallow exposes the crown to temperature fluctuations. Aim for that crown to sit just below soil level—about ½ inch down. I like to use a small stick to mark the depth before planting, then double-check after filling the hole. After planting, give it a thorough watering until the soil is moist 2 inches down—this helps settle the roots and removes air pockets.
Slug Defense: The crushed eggshells or diatomaceous earth mentioned in Step 5 are your best friends against slugs. But here's a bonus tip: create a barrier of sharp gravel around your hostas—slugs won't cross it. I also plant a ring of garlic or chives around the perimeter, which doubles as both slug deterrent and edible bonus. For extra protection, consider using beer traps (bury a shallow container filled with beer near your hostas)—slugs are attracted to it and drown.
Pro Tips for Curly Leaf Hosta
- Here's what nobody tells you about making these stunning perennials thrive year after year.
- Lighting Insight: The 4-6 hours of morning sun in Step 1 is crucial—think of it like the perfect coffee brew. Too lit...
- Soil Prep Secret: When amending your soil with 3-4 inches of compost in Step 2, don't just toss it on top. Mix it tho...
Frequently asked questions
How do I protect curly leaf hosta from slugs and snails?
Curly leaf hosta is a slug magnet, but don’t fret! Start with copper barriers around plantings (slugs hate the electric-like sensation). Sprinkle diatomaceous earth or crushed eggshells in the soil—it’s non-toxic but deadly to pests. For heavy infestations, try iron phosphate baits (pet-safe!). Pro tip: Plant curly leaf hosta near garlic or thyme—slugs avoid the scent!
When is the best time to plant curly leaf hosta?
Spring or early fall are ideal! Plant in cool, damp weather (avoid scorching summer heat or freezing winter). If planting in spring, wait until after the last frost when soil is workable. For fall, aim for 4–6 weeks before your first frost—roots establish before winter. Bonus: Mulch with 3–4 inches of shredded bark to retain moisture and regulate temps.
Can I grow curly leaf hosta in containers?
Choose a wide, shallow container (at least 12–18 inches in diameter) with drainage holes. Use a well-draining potting mix (add perlite or sand for aeration). Warning: Containers dry out faster—water deeply 2–3 times weekly in summer. Slugs love containers too! Elevate pots on feet or saucers to deter pests.
Why are my curly leaf hosta leaves turning yellow or brown?
Yellowing often signals overwatering or poor drainage. Let soil dry slightly between waterings—hostas hate soggy roots! Brown edges? It could be sunburn (they prefer partial shade) or nutrient deficiency. Feed with a balanced fertilizer (10-10-10) in spring. Check for pests too! Slugs and aphids can cause browning.
What are some slug-resistant alternatives to curly leaf hosta?
If slugs are relentless, try these low-maintenance, pest-resistant plants:
Pro tip: Mix these with curly leaf hosta for a slug-proof shade garden!
Wrapping up and next steps
Curly Leaf Hosta isn’t just a stunning addition to your garden—it’s a low-maintenance, slug-resistant superstar that thrives year-round with the right care. From selecting the perfect spot to mastering slug deterrents and winter prep, you now have all the tools to keep its lush foliage flourishing without the hassle. 🌿
Ready to transform your garden? Start small: Plant one or two this season, experiment with the tips you’ve learned, and watch your Curly Leaf Hosta become the envy of the neighborhood. Happy gardening!